Wednesday, November 12, 2008

Why hole so big????

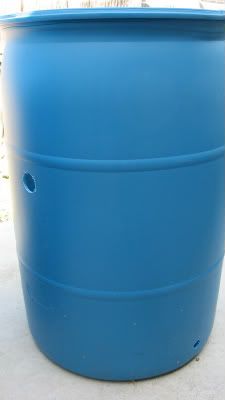
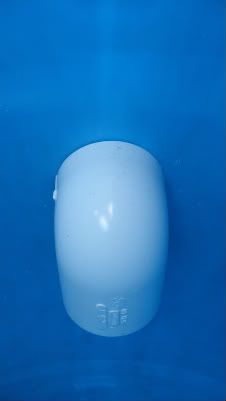
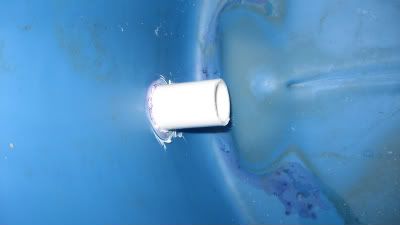
To answer a quick question regarding the water barrels and why I had to cut such large openings in them.

Basically, there are two types of used barrels that you will find. Ones that have screw off tops (thus usually handle dry type goods) and the ones I have (which have fixed lids that are melted onto the barrel)

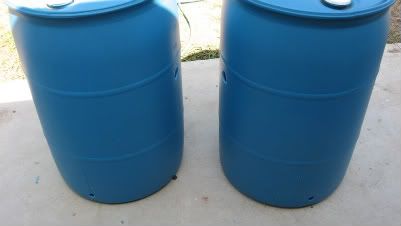
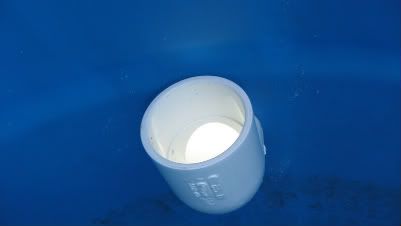
Now the reason for the large holes. it goes like this: I bent my brain trying to figure out how to drill the spigot and overflow holes and then cap them from the inside. There is no way to do it other than cutting an opening in the lid. Since I'm 6'2"  and 190 pounds, I had to make the large so I could fit inside to cap the spigot hole at the bottom. 

Also, bug control. if you have water barrels or any standing water for that matter (especially in the summer) and don't want to take daily malaria pills (although gin and tonics will also work), you can get these little donut type deals from Home Desperate that hold a dormant bacteria that once activated, go after the mosquito larva like they were popcorn. I highly suggest them, that is unless you enjoy itching your skin till it bleeds. Everyone needs a hobby. ;) 

So there it is. If you have any other questions, please write, I do respond to questions, because I need something to continually boost my ego. :) 

Cheers. 

Sunday, November 9, 2008

What are those blue things? Part 2

Oh, Oh, HUH?
09-29-08_1602-1.jpg picture by Javaman8263
Mind you when I took the above photo with my crappy little phone, it was Sept 29th!!!

It wasn't even freakin' October yet!!!!!

Sigh. Soon we will be seeing X-Mass decorations on sale after the 4th of July.

Anyway, Part two of my little rain barrel ordeal.

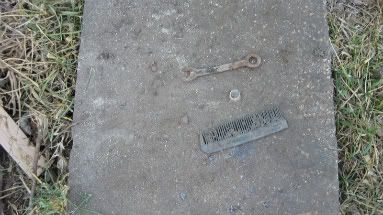
Oh one other thing before I forget, when last I left you, I dug the hole and put in the blocks, while doing this I came across a little urban archeology...

IMG_0871-1.jpg picture by Javaman8263

A comb? whatever...

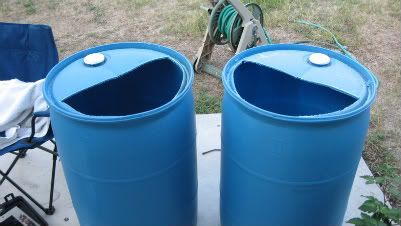
Okay, as you can see, I cut half moon openings into the tops of the barrels. I did this with a ZawSaw, using the metal blade. I first drilled a few large holes to allow the blade to pass through. It proved to be surprisingly easy. Took all of 10 minute for both.

IMG_0875.jpg picture by Javaman8263

They look kind of happy, don't they? Okay, that was very green geeky.

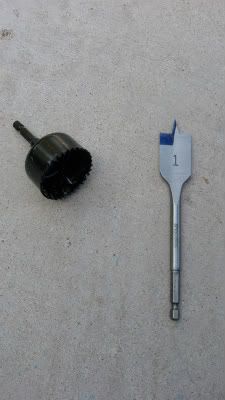
Bits I used...

IMG_0879.jpg picture by Javaman8263

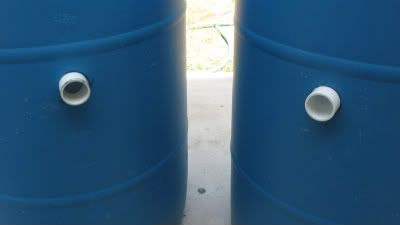
Next, using 1 3/4" corer, I cut the over flow and pass through holes on each barrel.

IMG_0876.jpg picture by Javaman8263

here's a better pic

IMG_0877.jpg picture by Javaman8263

next I cut 1" hole near the bottom for the 3/4" pvc pipe. I used a 1" paddle drill bit.

Next, you need a short piece of 1 1/2" pvc , 1 coupler and a street elbow. I put the little piece of pvc in the hole...

IMG_0880.jpg picture by Javaman8263

and glued the coupler on one side...

IMG_0886.jpg picture by Javaman8263

and glued the street elbow on the other... Pushing them tightly together.

IMG_0881.jpg picture by Javaman8263

pointing up on the main barrel side and...

IMG_0882.jpg picture by Javaman8263

pointing down on the reserve barrel side.

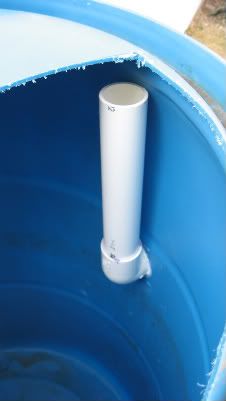
Here is the completed PVC pipe on the main barrel.

IMG_0888.jpg picture by Javaman8263

It's pointed up so as when the barrel is full, the water once it has sort it's level will then drain into the backup barrel.

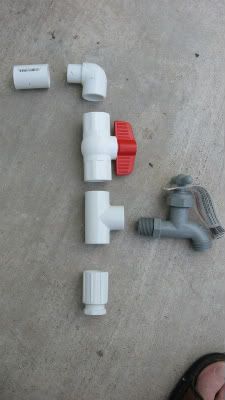
I next put together my system for the spigot and trash drain. it looks something like this...

IMG_0884.jpg picture by Javaman8263

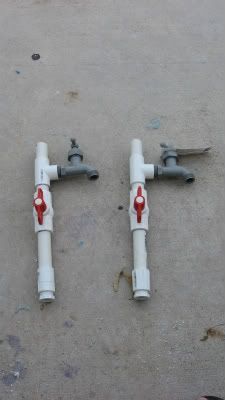
However, this is how the final looks...

IMG_0889.jpg picture by Javaman8263

Note that the cut off is below the spigot. This is so no trash from the roof, bugs, bird poop, etc will spill off with the water, instead it will settle below the spigot. I put the shut off below the spigot as well so this way I won't lose any water. I can cut it off and still use the water while cleaning the trash trap. I did this because I plan to put in a drip system for my garden. No interruption of watering.

Much like the 1 1/2" pvc above I fit the 3/4" pvc in the bottom in the same manner. only this time, I just used an elbow street valve straight into the hole with a coupler on the other side. I used no additional short pieces of 3/4" pvc, just what you see.

IMG_0887.jpg picture by Javaman8263

Once everything was fitted and glued, I sealed everything with silicon sealant. No leaks yet :)

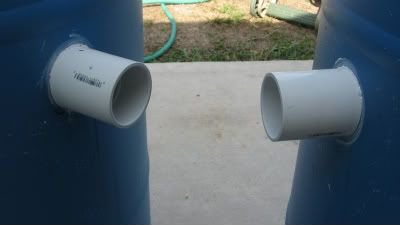
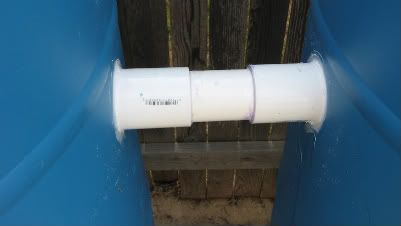
I now placed everything on a two high stack of 8" cinder block. Then joined the two barrels together...

IMG_0890.jpg picture by Javaman8263

This is the overflow go between.

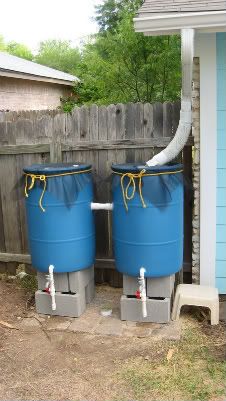
Here's a wide shot of everything together...

IMG_0894-1.jpg picture by Javaman8263

I got some vinyl screen and had some old rope laying around. I have since replaced the rope with webbing that I bought over at REI.

All told, the whole set up cost me roughly 150.00, that includes lots of mistakes, cuts, and copious amounts of swearing.

I plan on adding more barrels to this set up but putting in an additional overflow to the back up barrel.

So far so good, no leaks. ;)

Next project will be a little side deal. Small herb gardens for my wife. Made from galvanized tubs.

Cheers!!!


Monday, October 13, 2008

What are those blue things? Part 1

Ahh, going green. Looks great on paper, but in reality, it's somewhat a colossal pain in the buttocks, but the results are worth it.

Rain barrels. Frankly, this past summer has been sooooooo rainless, I think my act of building them is a modern version of the rain dance, only instead of dancing, traditional singing and a celebration of the earth; there was instead lots of swearing. :)

So let's begin!

The barrels.

<Photobucket


These are food grade barrels that I got from a local salad dressing company that I found on craigslist. Just type in rainbarrels and you will surprised what will come up.

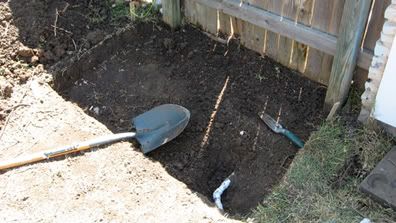
Before I get to modifying the barrels I had to first prepare the ground...

hole.jpg picture by Javaman8263
I dug out a plot 4 feet by 2 1/2 feet. 4 inches deep.

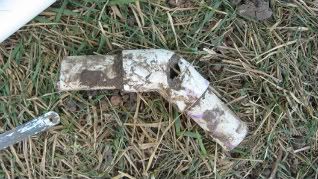
If you notice the pipe in the upper right corner, well, that's were this happened...

pipehole.jpg picture by Javaman8263

One must know where all water lines run in ones back yard before driving sharp shovels into the ground.

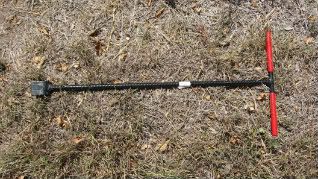
And here is a very handy tool to keep around...

waterwrech-1.jpg picture by Javaman8263

This little gadget allows one to shut off the main water line so the geyser of water shooting from the ground will stop. ;)

It was a humbling moment.

After a while, the ground soaked up the water and I was able to continue.

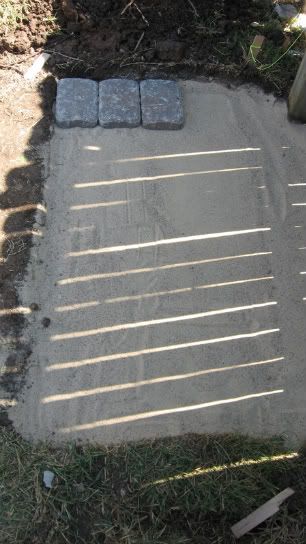
I then filed it with 2 inches of sand, to allow for expansion and contraction during the hot hot hot Texas summers and the chilly and occasionally freezing winter months.

I also started placing my bricks. Keep a level handy. You want to try and keep them as level as possible, but be aware, some settling will occur during flight.
IMG_0866.jpg picture by Javaman8263


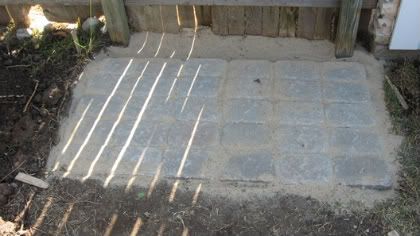
With all the brinks in place. I took the remaining sand and spread it out over the bricks to fill in the cracks...
fulltile.jpg picture by Javaman8263


My ground is now prepared for the barrels.

That is the end of part one.

FYI: I got the bricks at Home Desperate for 1.39 a piece, the sand was cheap. Each 50 lb bag was 99 cents.

Tomorrow: What are those blue things? Part 2. I modify the barrels and install all the piping. Weeeeeee!!

Sunday, October 12, 2008

What the Green???

Hey all,
This is my attempt at helping folks trying to go green. This will be for those people who haven't the foggiest idea where to start, how to start or even what being green means.

"Green" is a very over used term these days. It's applied to everything from coal to toilet paper.

To me, simply put, is decreasing ones carbon foot print on the earth. I mean, is that hard to understand? Meh, I guess some people believe so.

Anyway, this blog will follow me and my wife's trials and tribulations in "greening" our home and yard.

Granted, a major portion of this blog will be mostly about my yard and how we are on a mission to grow as much food as we can in our yard but at the same time to work with nature by having a place for butterflys, bees, birds and other critters to live.

That said, let the insanity begin!!

First up, a little background. My wife and I have just finished suffering through remodeling our home for the past 2 1/2 years. I did about 65% of the work and had contractors do the other 45%. We got contractors mostly to help preserve our sanity.
Now that the house is about 95% complete, I'm now shifting my attention to the backyard.

And here is my yard:
Backyardhalfw-arrows.jpg picture by Javaman8263
I'm still new at this and will work out the kinks as time goes by. Okay, after messing around with the photo, it appears as if photobucket.com (the place where I source my photos from) as a size limit. Sigh.

If you can read the teeny tiny itzy bitzy print, there are several arrows with numbers. This is basically the order by which I'm going to take on each and every project.

Briefly, 1) I will install rain-barrels 2) rebuild my Fred Flintstone composter 3) Build a new clothes line (instead of the last minute quickly I put up 2 years ago) 4) figure out something to do with the condensation line from my A/C unit 5) the most ambitious project of them all - relocate my shed and build a root cellar underneath it. That will be a massive undertaking. And our ongoing garden expansion.

We have gigantic plans for turning our entire yard into a food factory and we will do this by employing the squirrels as unskilled labor thus saving on overhead and our backs. We are currently working with the squirrel union boss. We hope to reach an agreement soon.

That aside. Water. Everyone needs it and so do plants. I could use our hose and pay for the water, but since I have a cheapskate tendency running through my veins, I choose to get the free stuff from the sky at least for the garden...for now.

My next post will show the step by step procedure for how I put together the rain barrel. It will include time, costs, stubbed thumbs and the general insanity that went into rain barrel construction.

Thanks and remember, Green is good!!!