Tuesday, May 29, 2012

Why do I do this to myself?

So I have the bees, I put in a clothesline, I built a fence and a composter, raised bed gardens, install "monster" water tanks, moved the freakishly heavy shed (yes, I took everything out first) and now this. Ugh!!!

Photobucket

This is the side of my house. Stunning, huh? Yeah, it's really not all that. (the dead tree is my neighbors)Here's a list of things I need to do before this next project kills me.

1) remove sidewalk.

2) dig out the bushy weird ground growth in front of fence.

3) remove fence and replace with gated arbor

4) put in pathway

5) put in cow panel fence

6) install secret side project the zoning people don't need to know about.

7) put in pretty pretty flowers.

8) drop dead. :) Weeee!!!!

Just imagine me laughing manically as I write this list and realizing just what the &%$#@@ I've gotten myself into!!!

Well, the worst part, the very very worst part, the part that this whole entire insane project centers around that must be done first? Numero Uno? Remove that bizarre side walk.

Look back at the photo. There are a few things wrong with my lovely side walk. 1) it's drifting away from the house like a concrete glacier. (I'm into lists today. 1) think of stuff 2) write it down 3) create a list) 2) the drifting concrete if not dealt with promptly, could do damage to my gas line (when they built the house they put the gas line right through the middle of the side walk) and finally 3) if you look carefully at the photo, you will notice that the side walk bisects the gate. So technically, it's half a side walk. There were some real genius's at work when putting this thing in.

So first things first 1) scream out in aguish over having to remove a side walk.

Well, that's not much of a list. But really, after thinking about having to remove the thing, I had nothing else to add other than screaming.

Then I was off to the good people at Home Desperate to rent a concrete cutter. What's that you say? It's this thing straight out of a horror film...

Photobucket

The blade alone costs 75 bucks! It's coated with itty bitty diamonds. And no they don't rent blades...I asked.

All told, for a 24 hour rental 179 freakin bucks I will never ever see again. (That's with the blade)

Now when I first looked at my side walk, here it is again...

Photobucket

It's only 30 feet long...the longest "only 30" feet of my entire life.

Now if you don't know much about cutting concrete, which I didn't and only watched other people do, it's much like cutting tile, which I have never done but have watched other people do. You need lots and lots of beer, no wait! not that, although it helps, but water. Lots of water.

You want to keep the blade cool and it cuts down on it's wear. Otherwise I would be flying through blades quickly. Flying through blades? That's an image, huh?

I forgot to take photos of that first little block. My demo block if you will but we now join our hero cutting the rest.

First score the concrete...

Photobucket

one way then the other...

Photobucket

The photos eliminate the concrete water spraying up my leg and the entire time me being bent over with my forearms resting on my thighs while I slowly push the cutter through the concrete while my back screams obscenities at me in several different languages.

Each one of those lines I had to cut 3 times at 3 different depths. The concrete was 4 inches thick. Each "score" was about 1 inch deeper than the last. So first time 1 inch, second time 2 inches, and lastly 3rd time 3 inches. (Thanks to my co-worker David W. for the suggestion!)Then I went back with a block of wood and a sledge hammer and knocked them apart.

Here is a photo of a very tired and miserable SuburbanDweller...

Photobucket

Yes, those are sandals and yes, I still have all my toes. That's me, breaking apart the concrete after it had been scored. You will notice the gas meter behind me...

Photobucket

Note the crack in the concrete. That was a big help. I cut round it as best as I could without setting off an explosion. I'm writing this so I guess I didn't blow myself to smithereens.

After a long tiring day, of being soaked with wet gritty concrete mud up my legs, working out in the backing sun, and hauling around a 50 pound concrete cutter all day long, for which my back still hasn't forgiven me, I was done...

Photobucket

What will I do with all that concrete? Well, that was the reason I rented the concrete cutter in the first place. I cut them into blocks which I will use to block in some of my flower garden my back yard.

Photobucket

It's not pretty now, but after some "shaping" it will look a lot better.

I'm tired of saying and writing "concrete".

So that is part one of this crazy @ss project.

Photobucket

Now for a few picts..

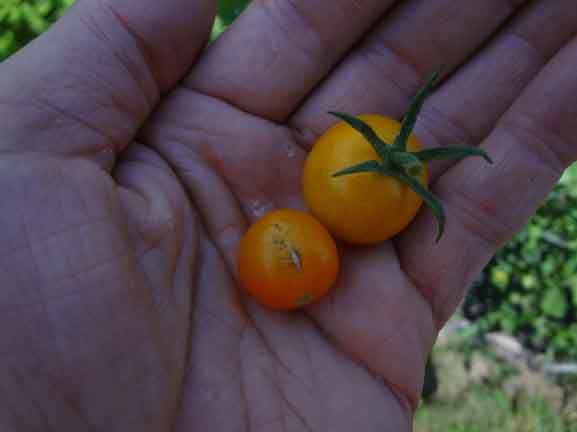
My first tomatoes of the season...

Photobucket

These are sun sugar cherry tomatoes, I highly suggest you try growing some of these yummy guys next year.  (A helping hand by...um...Mr. Hand)Photobucket

(My days as a hand model are long behind me)

And a few yet to be picked... (you can't tell in the photo, but these guys are as big as baseballs)
Photobucket

And lastly, a bee pict...

Photobucket

As always, Green is good!

Cheers!
Wednesday, May 23, 2012

Odds and ends...

Yeah yeah, it's a little late this week. This is just a few things before next weeks premier of the new project. Ugh.

First and for most, it's "skeeter" season. You know, these little &%$#@&&%s...

Photobucket

I'm a magnet for them. I have tried everything short of soaking myself in DDT to every possible natural repellent out there. However, no matter what I coat myself in, they love me. LOVE me. My siblings know full well of the famous "ear incident" when I was a wee lad. It was ugly.

So what's the point of this? Am I now going to promote some crazy @ss cure all repellent? No. I've given myself over to the beast. The winged demons have won. (hangs head in shame) I now treat the after effects. You know, the &%$#@ Bites!!!

We all know how much those stings just itch beyond reality, right? But honestly, when you have a bite, doesn't scratching one now and then feel oh soooooooo goooooooooooood. Ahhhhhhhh, yeah, that's the stuff. But what's left? An ugly mess.

So now, I use this...(no the company hasn't sent me a free case or anything. Not that I would turn it down. I would probably bathe in it. Hmmm, okay, a little weird)
Photobucket
It works. Let me say that again, IT WORKS! And like the old Brill Cream commercials, "A little dab with do ya!"

As soon as I feel the itch, I rub some on, in about 30 seconds, no itch. I swear by it. And it lasts. I find that I rarely if ever have to reapply it.

So this is just me Suburban Man - Dweller dude just passing a long a little friendly tip to beat the itch. :)

Now back to our regular programming.

Onions. We eat them and some people smell like them.

As I wrote last week, I pulled up a mess of them. I still have some fat ones in the ground that I will yank out this coming weekend.

But here is the process if you wish to preserve your onions. Pretty simple actually.

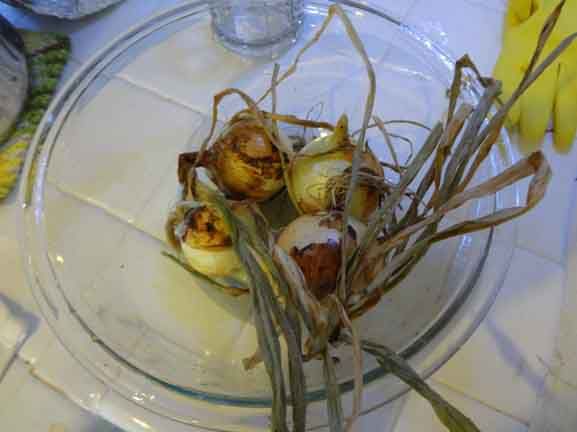
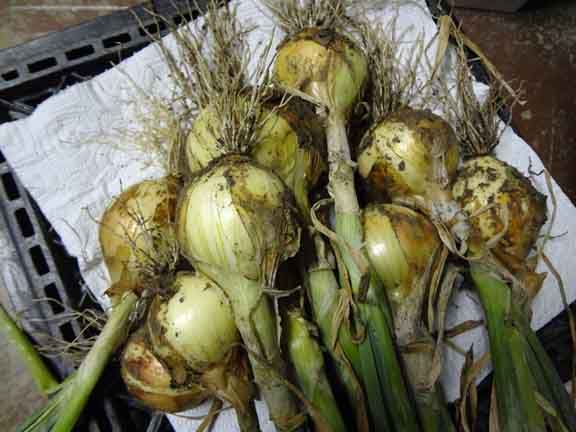
First grow some onions then pick'em...(or buy them)

Photobucket
You will know they are ready to pick when the tops fall over.

Let them sit about 48 hours in a dark place.

Wash them.

Cut off the stems and roots. (if you pick them earlier before the stems fall over, you can also use the stems in cooking. They are something like chives)

Photobucket
I know, big dramatic difference from the last photo.

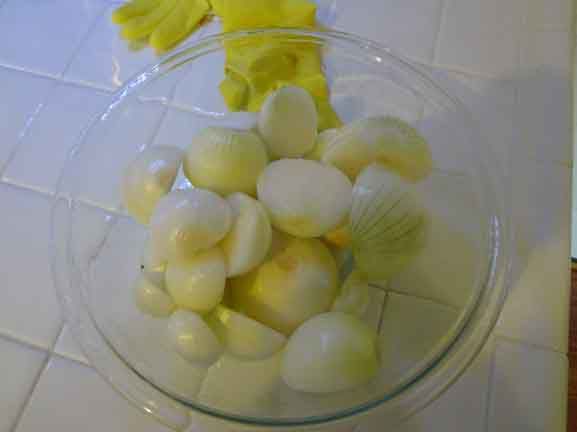
Then peel them.

Photobucket
Naked onions.

Then mince in a food processor.

Here they are packed up and ready for the deep freeze.
Photobucket

Out of that bowl we got 5 bags of onions for future use.

Once frozen, you can just break off what you need for cooking. The flatter they are, the easier they are to deal with later. We packed ours a little full, so we will pay for that later. "Honey, have you a hammer handy?!"

I still have an equal amount of onions yet to harvest and they are much bigger so our yield will be that much more.

Now I have a special technique for dealing with the crying game. Wait, what? I'm talking about cutting onions! The popular belief is to cut them under running water. 1) it's a colossal waste of water 2) have you ever actually tried it in volume? 3) frankly, it's a real pain.

So how do I solve this perplexing matter?

Here is my secret. Swim goggles. That's right, you heard me, swim goggles. No weeping, no crying, no boo hooing. And I can guarantee you will never ever see a photo of me on here wearing goggles and cutting onions, but it works. Oh all right...

Photobucket

It's the pink what does it!

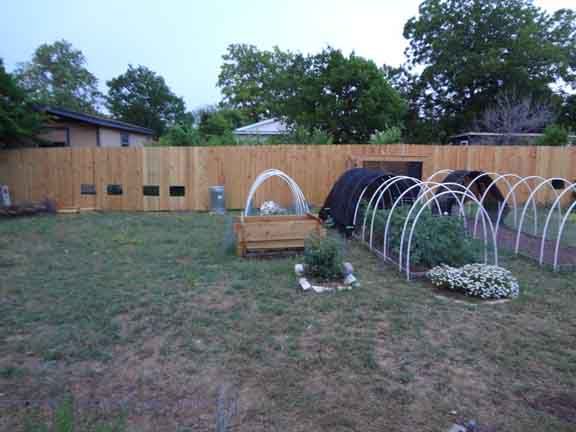
So that's it for this week! :) One of my 3 1/2 or so readers requested a few updated photos of my garden, here you go!

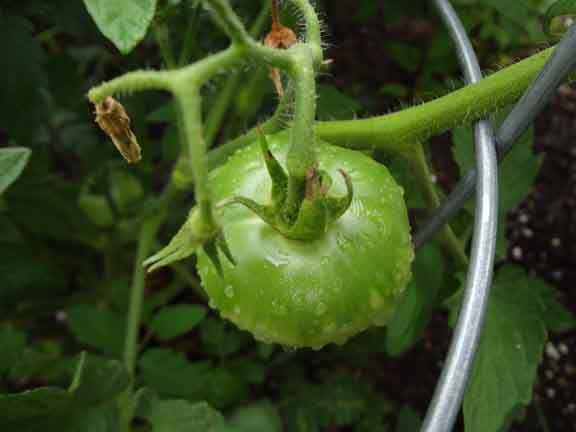
Tomatoes...

Photobucket
(This was taken last week. They are much bigger now.)

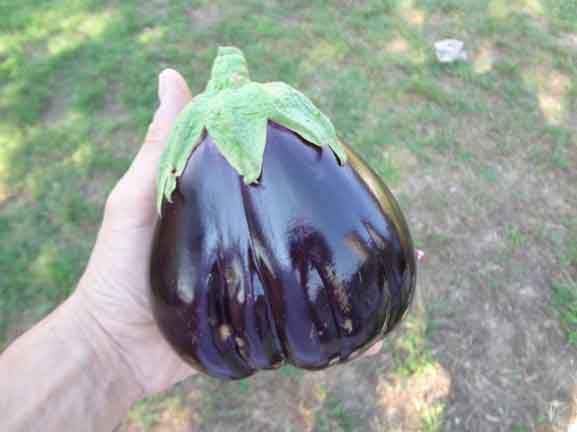
Egg Plant...

Photobucket
We pulled two huge egg plants off already. I have fried some up and froze them, in preparation for egg plant parmesan. (I have to wait until after we harvest our tomatoes).

The big plan will be: our egg plants, our tomatoes and our mozzarella cheese (I will be attempting to make mozzarella again. Wish me luck!)

If you look to the right of the upper egg plant...plant, you will see a little something growing. Yet another surprise plant growing from my compost. I think it's cucumber, but I'm not quite sure what it is yet. I'll include a photo of it next week.

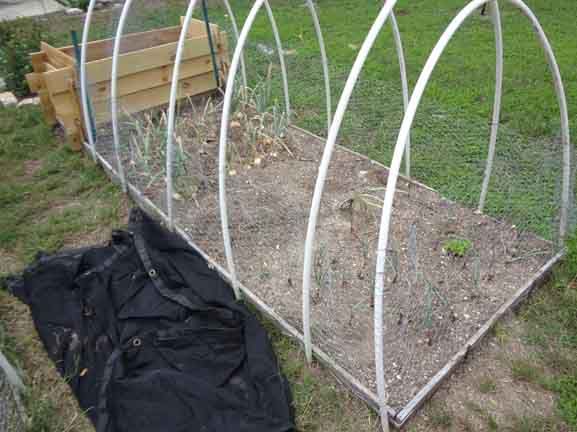
The last of the yellow onions and the new red onions...

Photobucket
(That black thing is my 60% sun shade block. I put that on my new plants and plants that can't take the intense Texas sun at the height of the day)

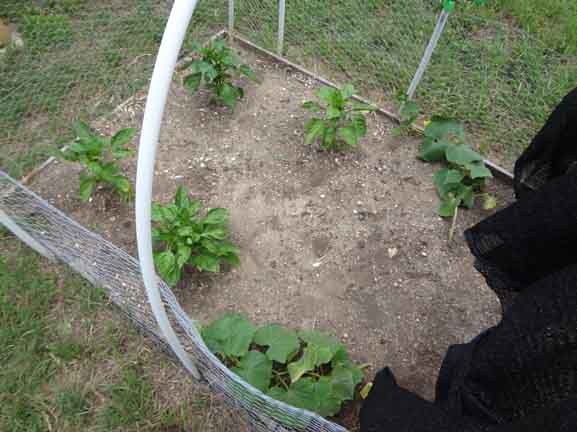
Peppers and cucumbers...

Photobucket

They are still little things but I have a few peppers already and the anti-dog-with-a-thousand-teeth barrier works double duty as an impromptu trellis for the cucumbers. :)

Lastly, I leave you with a couple of photos...

Blue...

Photobucket

Purple...

Photobucket
(Thank you Mr. Hand)

And as always, Green is Good!

Tuesday, May 15, 2012

Okay, I think I'm buzzed...Part 4...

okay okay, enough with the bees...well maybe one last time then back to the garden and my other insane projects.

When last we were together, I showed y'all how I installed the bees. Well, that was 5 weeks ago. And how time flies.

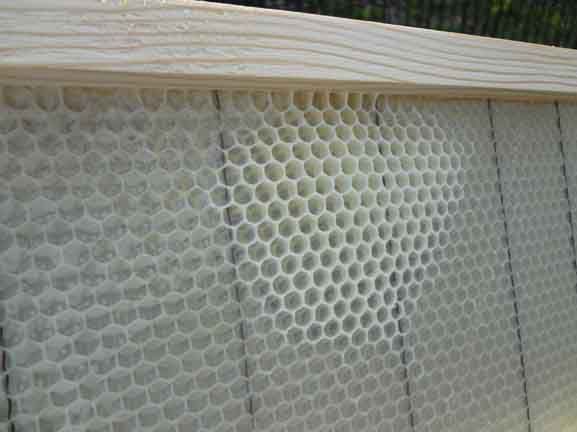
This is what the frames looked like before I put them into the hive...

Photobucket
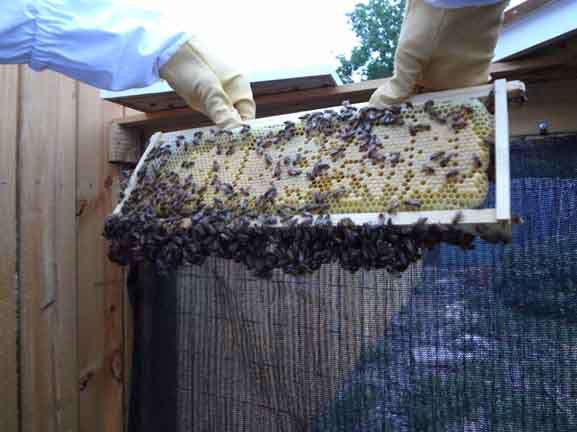
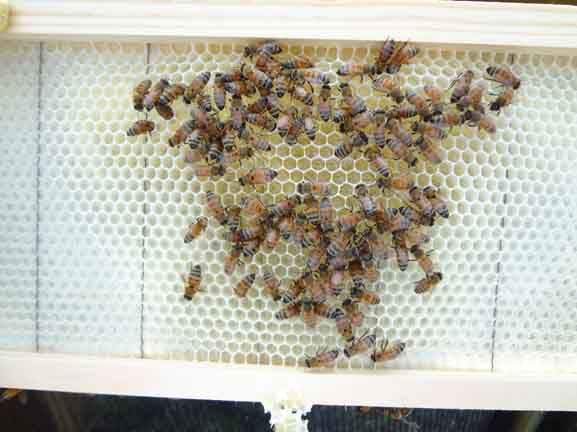
Here's what they look like now!

Photobucket

Quite a change huh?

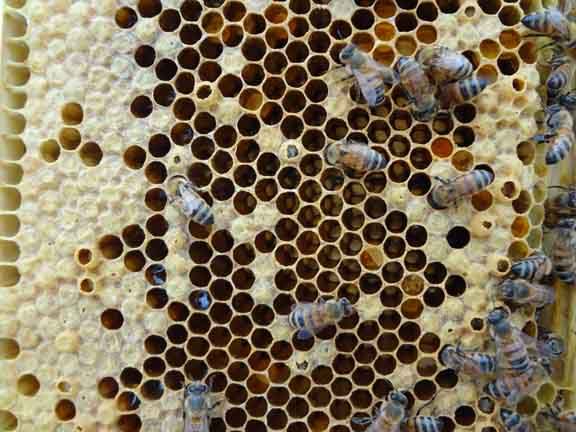
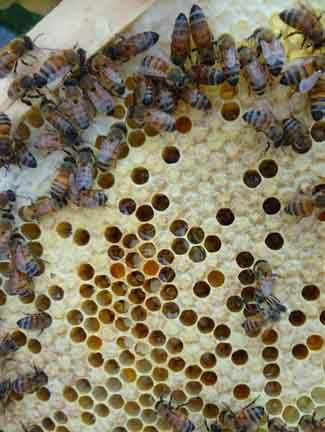
Here's a close up...

Photobucket

If you look closely, you will see the white bee larva, the orange pollen and the caps of honey (located near the top of the photo)

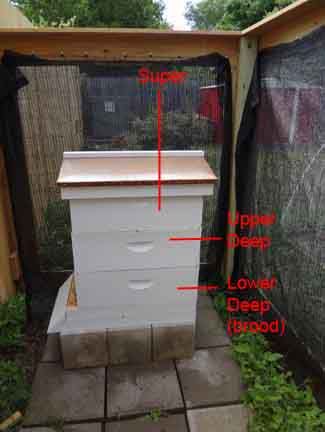
Things are humming along. This week I added a "super". What is a super? Here's a photo...

Photobucket

The upper deep allows more room for the bees to grow and expand. The super will be for honey production. Right now, it just has a feeder in it. In a few weeks once the bees fill up the upper deep as they have filled out the lower deep, then I will add frames to the super and put a "Queen Excluder" between the "deeps" and the super. This will keep the Queen from laying eggs in there and only allow workers and drones in there to produce honey goodness. :)

The bees appear to be healthy and nothing weird going on.

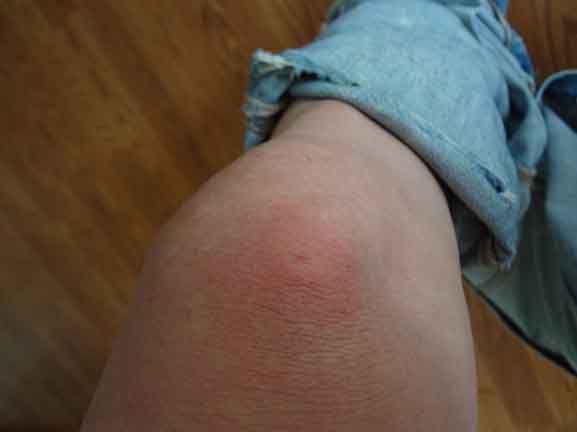
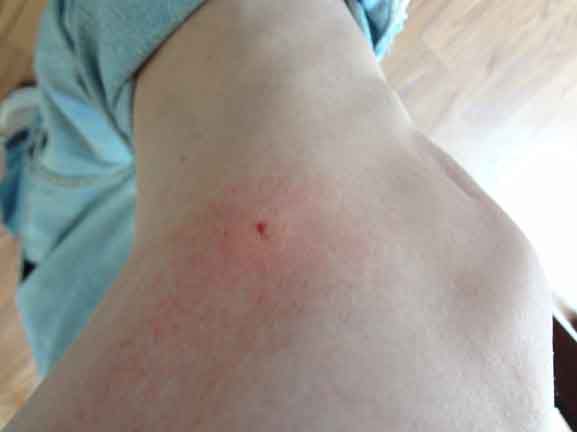
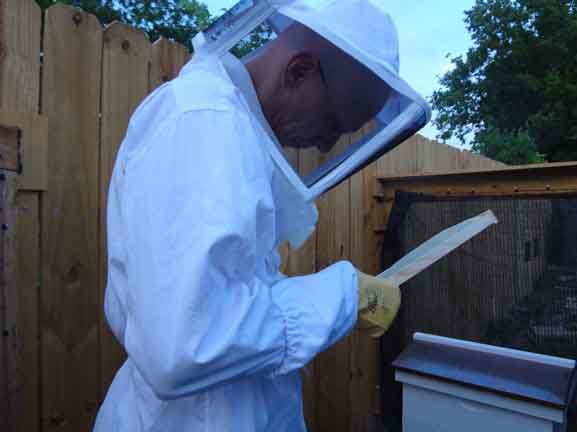
However, here's a really good tip for anyone wishing to be a bee keeper. Always, and I mean always wear jeans that don't have holes. Yeah. about that...

Photobucket

and...

Photobucket

The first photo was a glancing blow, the second one...a direct hit.

So Imagine if you will Suburbandweller is inspecting the hive looking all cool in his bee garb, but suddenly, SuburbanDweller becomes all thumbs! And bumps one of the frame against the top of the hive.

The bees really didn't care for that too much. Suddenly about 30 bees (probably only about 10) swarmed out and started buzzing around me. I stood completely still, hoping they would quiet down. Nice little bees, nice little bees. Slowly, I reached for my smoker. I think they saw me.

Ahhhhh! Suddenly there about 3 bees in my pants. Here I am, still holding the frame, trying to shoo the bees away from my very exposed knee and to get the ones out of my pants and also trying to get the smoker! Oh for the want of the 3rd arm! Dancing on one foot. Trying to close the hole in my pants And trying to replace the frame gently back into the hive, the bees went in for the kill. Zing! The first one! Zap! The second one. Now I haven't been stung in quite some time. The last time was when I was about 20 and it was on the roof of my mouth! Yeah, Bill K knows all about that one!

So in goes the frame, out comes the smoke and I let them have it. I smoked the living heck out of everything that moved. Take that, you! It was a humbling experience. I had this very naive thought about me and the bees being buds. I feed them, they treat me right and all is fine in the world. But noooooooo, they have to be all protective of THEIR hive. Buggers. While my knee was still throbbing, I still had half a hive to inspect. I couldn't just leave it.

So I quickened the pace and tried not to P'off the bees any further.

I was happy to see they were developing comb in the upper deep...

Photobucket

And another shot...

Photobucket

This was a good sign.

So from now on it's just observing and hoping nothing infests or contaminates the hive.

My hive updates will be not as intense from here on out as I want to get back to my main focus of my blog. My garden. :)

What's going on in the garden? Lots...

I just harvested my first batch of onions (this is just under half)...

Photobucket

This photo of my eggplant is about a week old. They are about double this size now...(I have at least 4 that I have counted but I know there are quite a few more)

Photobucket

My peppers...

Photobucket

My cucumbers...

Photobucket

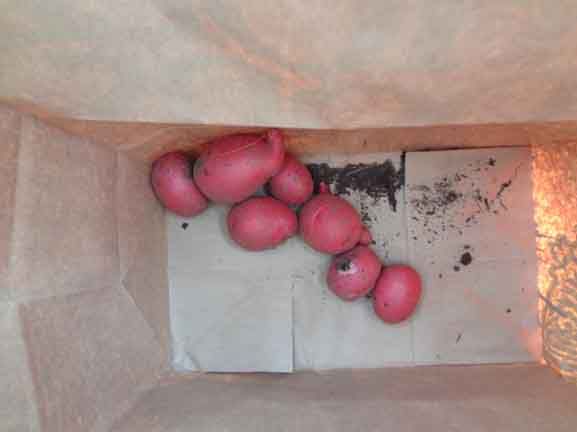
And as I special treat (I haven't mentioned them in a while) Potatos!

Photobucket

Yeah yeah, I know, only 7, but that's seven more than I had the last 3 tries! LOL I know now that I have to plant them a bit earlier, perhaps in late December. When the tops of the plant die off, that's time to harvest them. I thought they died off a little soon. The roots still had a ton of room to grow. So a bit earlier next year or later this year.

I did get a surprise out of my compost this year...

Photobucket

Acorn squash! This is the kind of surprise I really enjoy!

Lastly, one of my new readers requested a photo of my garden. I didn't get a chance this week, but I will be sure to include one next week. :)

In the mean time, here's a little bit more color from my garden.

Remember, Green is good. :)

Red...

Photobucket

Pink...ish...

Photobucket

Angry SuburbanDweller (very rare photo of yours truly)

Photobucket

Cheers!
Sunday, May 6, 2012

Nice little bee...Ouch!!!! Why you little... Part 3

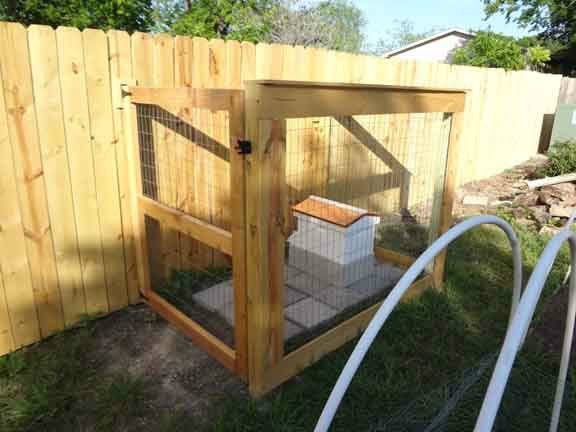
So when we last left our hero, I had just completed the "enclosure" for my little friends.

beeenclosure
I won't bore you with the countless pictures I took ad nauseum of the progress of the fence as I was putting it up. I know that you are all just soooooooo eager to see the freaking bees.

I will leave you with one photo...

Photobucket
Notice the cut outs? That's for me when I get bored and need to spy on my neighbors! They think my fence will stop my snooping! Bah! I say Bah! The up shot is, Paulie likes them too!

Okay, the bees.

These photos I'm showing now are 4 weeks old. This is when I first got them.

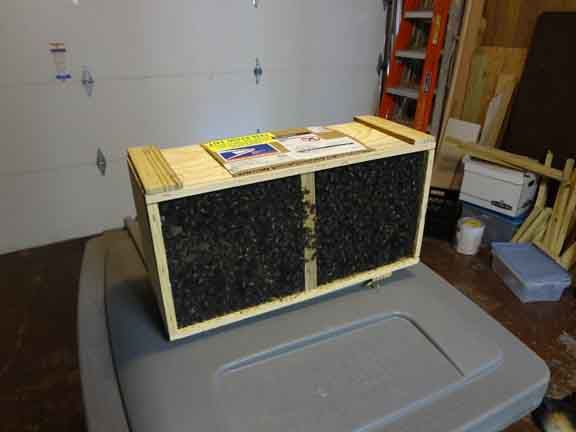
Box O'Bees...

Photobucket

That's how 3 pounds of bees, (roughly 10,000 bees) plus the queen, arrives.

The postman delivered them in one of those plastic US Post Office boxes. He gave me a side glance, "here are your...bees" and nudged the box with his foot toward me. I was so happy to finally get them, (they took a week to get here), I just picked box right up and handed his US Postal box back. "You want this right?" I said. He sort of just snatched it back. "Yeah, thanks" and took off across the lawn.

I. Have. Bees!

It was still early in the day so I had to wait a while. I sat them on top of a trash can in my garage in the dark. I read somewhere it was suppose to calm them down.

Each time, I would have to go out in to the garage to get a tool or something, I would flip on the lights. Oh boy, the bees didn't like that. "We're trying to sleep over here!"

Just like humans, bees "sleep" at night. More like naps. I mean, heck they are working none stop all day long they could use a little shut eye.

So anyway, around dusk is the perfect time to introduce them to the hive. They are winding down after a long day and a long trip to my house.

Now, I have a lack of photos regarding the actual procedure of introducing the bees to the hive because my much more significant other was working. So I was flying solo.

However, before all this could happen I had to assemble the frames.

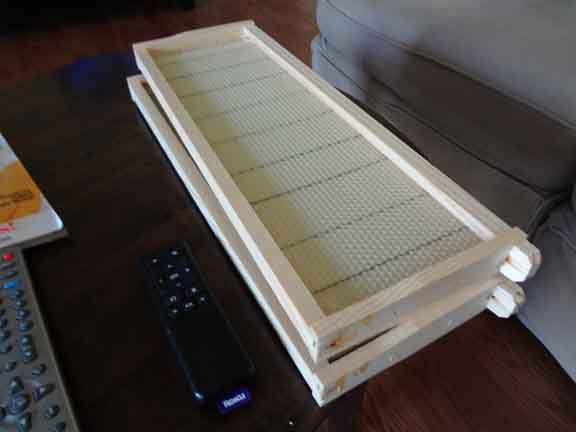
This is an assembled frame.

Photobucket

These are frames with a "foundation". Meaning the bees have something to work off of. There are "foundation-less hives but that's not something, as a first timer, I want to try right now.

I assembled them by putting the wax foundation into the frame. It's not as easy as it sounds.

I had 16 of them. One for the upper and lower "deeps". A "deep" is another term for the brood chamber where the bees lay their eggs, store their honey and pollen. When you start out, you only have a "lower deep" or one brood chamber so the bees can get accustomed to the queen and the hive.

Okay, The queen...

Photobucket

That's her on the left. On the right you see some sort of "cloudy" mess. That's sugar. It's a time release sort of thing.

You see, the queen is not raised with the bees that I received, so she has to be "introduced" to the hive. Which means they have to exchange pheromones back and forth. Basically, the bees are sizing her up and figuring out if she will be a good queen.

Bee #1: So what do you think of the new queen?

Bee #2: I just hope she doesn't get all, "oh look at me, I'm the queen!" I'll have none of that.

Bee #1: You only live 5 weeks she live 2 years.

Bee #2: then we should be more special, no? She should be kissing our feet!
If I just chucked the queen in there without first introducing her, the bees would kill her by stinging her to death. Nice image, huh?

So over a period of about 5 days, she eats through one side of the sugar and the bees in the hive eat through the other side. All the while checking her out.

Thankfully, they didn't reject her. Yay!

Okay, so the procedure goes like this. I take out half the frames and hang the queens container in-between two of the middle frames. Then I dump half the bees on her and the other half into the bottom of the hive.

Then I add the remaining frames.

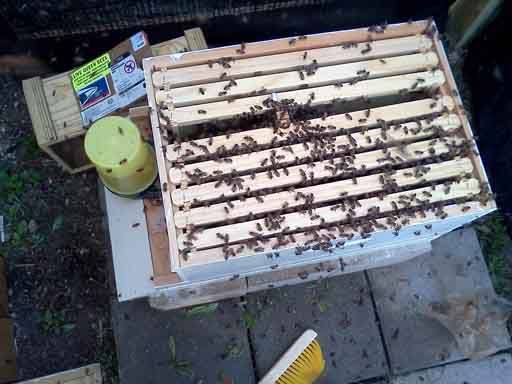
Photobucket

You can see the queen box set between the frames and the bees running around trying to figure out their new digs.

On the side, you will notice a yellow thingy. That's their feeder. Yes, you need to feed bees. It's a sugar water mixture at a 2:1 ratio. Thick syrup.

That helps the hive get up and running. Without it, they probably would either slowly starve to death, or just take off and swarm away. Until they can establish feeding areas and have an adequate supply of nectar, they must be fed.

Now I just sit and wait. This all happened one month ago.

Just what have they been doing since then?

Well tune in next week and find out!

Whew! That was a lot of typing and a lot of info!

I will leave you now with some relaxing pict of my garden and flowers around my house.

Pink...

Photobucket

Purple...

Photobucket

Violet...

Photobucket

Green...

Photobucket

Well, that's it for this week! Next week, more bees, and the next project in my yard, which I like to refer to as the Concrete Path of Death. :) Cheery, no?

As always, Green is Good!