
Tuesday, December 8, 2009
Saturday, November 28, 2009
Easy as Cake! Piece of Pie!
It's been a long hot miserable summer. To quote from the movie Biloxi Blues, "Africa hot".


With that said, we were still able to actually grow something!
Oddly, with no rain I was still able to channel my Italian grandfather for his tried and true method of procuring water through draught sapping insanity!
The hose.
We ran out sometime in July and I had to resort to filling my barrels with, gasp, city water! Oh the humanity!
We are now looking into investing in two 250 gallon "tubs". They aren't as pretty as the blue demons, but they will do. Plus, they have a metal cage around them so, maybe, I'll try vining some grapes to them.
The Urbandweller is in a annoyed mood. I have a splitting headache and my, now very mixed up, dog just pooped outside, stepped in it and tracked it all over the house.
So, being the natural people we are, no caustic cleansers for us, no way, uh huh, nope, we use water and vinegar. Yes, it works actually really great , but you have to get accustomed to the vinegar smell...mix that with the flora of dog poop and you have a rather nasty...bouquet. Fortunately, it passes quickly and everything is very clean.
Cheap and clean, that's me! LOL
Okay, enough of my moaning and groaning.
Here's the "bounty" from this summer.
A little before and after action...
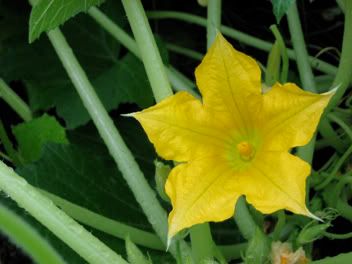
From this...

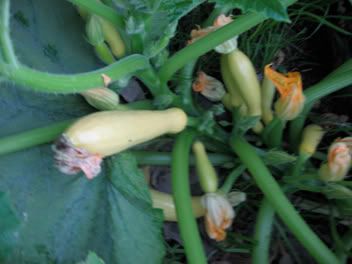
You get this...

A blurry sideways pic of mini squash, but you get the idea. They actually grew bigger but they were in my stomach before I could get a photo. We had a pretty good yield. Some where between 10 and 15. Not bad for not having the slightest clue as to how to grow them.
Next...
First you have this...

Then this...

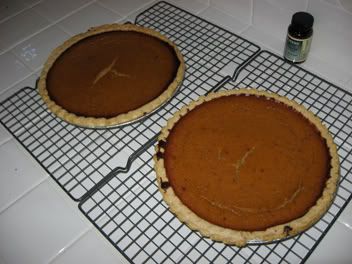
And finally...

That's right, I made pumpkin pies from pumpkins I grew!!! It's been a very weird abitition of mine for a very long time. By the way, this is a Honey-Pumpkin Pie recipe. No sugar for sweet, just honey.
My pumpkin endeavor wasn't the tri-fector, but that's for next year.
The Tri-Fector is: Jack-O-Lantern, roasted seeds and a pie.
I hadn't a clue as to how to grow this guys. I yielded 3. Yes, just 3, but it was enough for two pies, a chiffon thingy and a little left over.
Interesting side note: notice that the yellow summer squash blossoms were yellowish and so is the squash and the pumpkin blossoms were orange-ish and well so were the pumpkins. Yeah, I know it's like, "thank you, Mr. Obvious", but nature is just so amazingly simple yet remarkably complex.
Moving on.
Now then. First you have this...

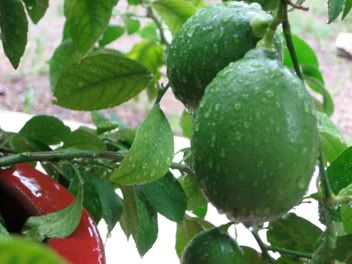
Then you have this...

A well lit bowl of lemons!
Our little dwarf Meyer's Lemon tree yielded about 18 lemons! Zested and squozed, we now have plenty of lemon innards to last us a good while. Sadly, I don't have photos of the blossoms. They are white will little yellow guts. And have the most unbelievable fragrance. I will make sure I post those next year.
So now, you ask, "Well, Urbandweller, that's all just fine and good, but what of that root celler? What might be the status of that?"
And I answer, "shut up...". Sigh. It beat me. That crazy hole in the ground beat me. I was digging that bad boy by hand. I got a total of 3 feet down. Didn't hit limestone, but it was taking so freaking long, that it was postponing everything else. (and killing my back) So now it's a filled hole. The hole is still there, just...filled. Get off my back.
I will continue with my plan of moving my storage shed and at some point in the future...never...I will take up the project once again.
If society collapses, then I will ask the neighbors to help and we will have a grand o'celler diggin' party! Boy, won't that be the time, huh?
Right.
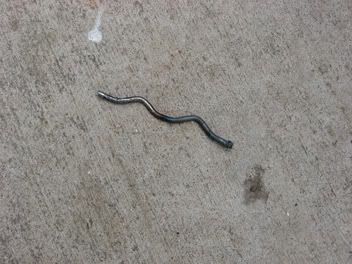
I leave you with the following photo below. As a kid I would find Cicadas crystalists everywhere but never the Cicadas. I would hear them endlessly, but alas, never see them. So when this moment presented itself, I couldn't pass it up and had to save it for posterity.
Remember Green is good!!!
Cheers. :)

Sunday, July 19, 2009
Worm poop, it's not just for breakfast anymore!
Calm down, I'm talking compost.
So this weekend I had to finally reap the harvest of the worms hard work. I wonder what Marx would think of that? LOL
I will be in real bad shape if they ever rise up and start a revolution. Tiny little pitchforks and torches!!! Thankfully they don't have thumbs.
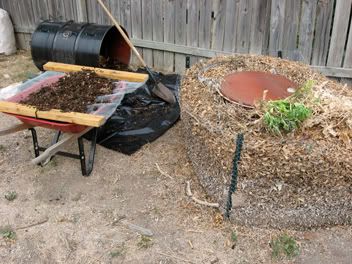
ANY way, here is the basic set up:

The barrel that I used for my compost has a quick release lid, (probably should have taken a photo of that, oh well) for a nice side access to the compost.
Now, if you're like me and had been once upon a time perusing various composters on line, you will notice, the model standing next to the said composter is 1) clean 2) smiling and (most important) 3) has copious amounts of fresh clean debris free compost!
Me on the other hand is 1) filthy 2) smiling inwardly, swearing outwardly 3) I do have copious amounts of compost BUT it requires sifting.
So I thought to my self, "Self? Do these composters magically sift the contents?" Yes and no, the cheap ones don't but yet, they still have the clean smiling, spokes person with copious amounts of debris free compost aka they lie. The ones that are really expensive, not only have various stages of sifters, they also have an auger like devise within the composter that takes the raw compost material through various stages of screens so when it finally arrives a the exit, it's debris free!!! And results in a clean smiling spokes model. One little secret: not everything composts a the same rate.
So I can bet you, that at some point that clean smiling spokes model will have to get in to that high end composter and unclog the large pieces that didn't make it through.
Thus ending in a swear fest of epic proportions. That makes me warm and fuzzy inside. :)
So in other words, there is no free ride when it comes to composting. :)
With that rant behind us, let's examine my crazy set up. The photo yet again.
On the wheel barrel you will see my little sifter. Okay, time out, every-time I write "sifter", I think of two very strange events in my life: 1) ditty bop sifter (if you don't know what this is or means, don't worry, it's completely infantile and ridiculous) and 2) My brother and I, as kids, had to sift sand for the construction of our patio that my dad was putting in at our house where we grew up. One day, I had to find my brother because we had to sift sand. I found him over at one of his friend's house, I told him, "daddy, has a little game for us, it's called sift the sand". My brother groaned and rolled his eyes but for some reason two of his friends just thought that was completely hysterical. Meh, okay, that's out of the way.
Okay, so my sifter is basically 1/4" galvanized screen screwed to two 2x4's. Then placed over the wheel barrow. I shovel it on and "sift it". Basically, moving it around by hand. No smiling, nothing clean about it and the Texas sun allows for gi-normous amounts of sweating. Upon finishing though, I did have copious amounts of fresh clean smelling compost. What does fresh clean compost smell like? It smells like dirt.
If you aren't sure how that smells, go out side, squat down, plant your face in the ground and take a big inhale. Aside from the bugs up your nose, it will actually smell pretty good. And you will be over come by an ancient and mystical need to roll around in it. Uh huh, right. After the neighbors call the cops and you are release on bail, you will understand the need for subtleness.
Any WAY, plastic drop things (they are not cloth) are very handy and can be reused over and over. Place one under the opening of the barrel before you open it up. You will be very grateful for this. And you want to have an additional plastic drop thing for the large pieces that don't sift. They will eventually after they break down, but just not right now, okay? Get off my back!
After you have sifted a bunch of compost, run your hand through it. This is were I get all weepy. It's simply beautiful. It's so clean. It's nothing but pure nutrients. Get to know your soil. Know were it comes from and what's in it.
Okay, back to the photo again:
You see that big leaf "corral"? I use that for a number of things, 1) dry materials for my compost 2) mulch and 3) covering for walkways between my garden beds.
That's roughly 20 - 25 bags of leaves raked from our lawn over the period of 1 year that has decayed down to good solid mulch at the bottom.
Nature is an amazing machine; it oils, lubricates and replaces all its parts if you allow it to. We just have to work with it and let it do its job.
On a side note: I planted pumpkins and summer squash about 1 week ago. On the seed package directions it stated that they would show seedlings in 2 weeks. These little guys wait for no one, they are already over 3 inches tall through the mulch!
Well, that's it for today.
Remember, Green is Good!
Cheers.
Wednesday, July 15, 2009
What the %$#@!!!
Just a quick one.
To those of you that know me, (the grand 2 people that read my widely popular blog), you will also know that I am a firm believer of the power of swearing. :)
Whack your thumb with a hammer and let rip with a stream that would make a marine blush and wow, that feels good. :)
Stub a toe and roar with a few obscenities that would kill a nun and wow, that feels good. :)
Smash you shin on a cinder block and let fly with enough swearing to fill the urban dictionary and wow, that feeeeeeeeeels soooooooooooo gooooooooood. :)
What's my point to all of this seemingly nonsense?
I. AM. RIGHT.
From the good people at Scientific American.
Profanity Bleeps Physical Pain
A study in the journal NeuroReport finds that using socially unacceptable "swear words" has physical effects that enable the swearer to tolerate pain better. Adam Hinterthuer reports.
Holy @$#%! According to neuroscientists from Britain’s Keele University, dropping the f-bomb can actually relieve physical pain. In the upcoming August 5th issue of the journal NeuroReport, the researchers say swearing is a different phenomenon than most language. It activates emotional centers in the right side of the brain, rather than those &#*@ing cerebral areas reserved for regular #$#y communication in the left hemisphere.
http://www.scientificamerican.com/podcast/episode.cfm?id=profanity-bleeps-physical-pain-09-07-13
Cheers!
And remember
Green is @#%$ Good!!!
Monday, July 6, 2009
How the heck do I get a seed from a cabbage???
Okay, in another departure from my backyard insanity, here is a link I think anyone who grows their own veggies can use.
http://www.seedsave.org/issi/issi_904.html
It gives all the details on how to save your own seeds.
Anyone that enjoys gardening, fresh veggies and knowing exactly where their food comes from, then saving seeds is the next step in your evolution.
There are many many seed vendors out there. Some are wonderful and follow all the organic practices set down by law, but then there are those that skirt the issue and then there are others that really don't care what we put in our bodies as long as the make a sale and make money. Rather than get myself into trouble and start calling corporations with lots of money names, I suggest you all watch:
The Future of Food.
Here is a link to their site:
http://www.thefutureoffood.com/AboutFOF.htm
Breifly, from the site, "THE FUTURE OF FOOD offers an in-depth investigation into the disturbing truth behind the unlabeled, patented, genetically engineered foods that have quietly filled U.S. grocery store shelves for the past decade."
Watch it and be prepared to be terrified. Also don't forget to check out Food,inc. If you really want to know where your food comes from, watch that movie. It's probably playing at an "art" house near you. Movies like this rarely get wide release because various powers that be would suddenly have to answer a lot of very uncomfortable questions. They can't have that now, can they?
I"m sorry, I've sort of wondered off topic regarding saving seeds. On the above site regarding seeds, it breaks it down into easy to read and follow basics for a variety of seeds. I mean really, how does one get seeds from an onion? This link shows you how.
So seed, grow, harvest, eat, compost, then start it all over again.
There are only a few things that make me tear up: The national anthem, huge amounts of money wasted on making really crappy movies and how the earth provides for us. No cracks. We take care of the earth, it takes care of us. It's really that simple.
Be kind to your soil and it will be so happy to please you in return. It's sort of like this really gigantic puppy that poops out...ah...um...food. bad analogy, but you get the idea.
Take care and remember, Green is good!!
Sunday, June 21, 2009
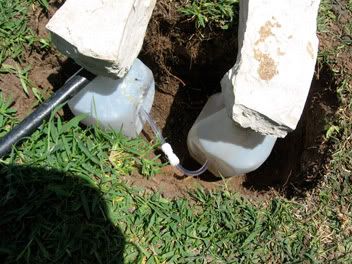
Look at dem JUGS!!!
Okay, calm down, this is a family network.
Here in the great state of Texas we have officially hit summer. The summer high pressure zone (yes, I'm a weather geek) has parked itself over our great state for the foreseeable future. What does that mean? It means blazing heat for at least the next few months. Which also means temps in the bazillions. This week, starting monday, it will be triple digit fun and excitement!! Weeee!!! Ugh...
And along with that fun comes drought. Throat parching, ground cracking, plant dying, crunchy brown lawn, withering, life sapping heat.
Where simple tasks such as picking-up-those-cutting-sheers-I-left-on-the-lawn-near-the-garden-for-only-a-moment, turns into a 15 minutes swear-fest while I run my hand under cold water to sooth the new blisters. Not that I would ever be THAT careless...really, I wouldn't...WHAT-ever.
Any and all you northerners all worry about climate change while you complain about too much rain or how you can't stay ahead of cutting your lawn, blah, blah, blah.
Well La-De-freakin'-Da! We got a freakin' seat front and center!! Mid to lat June 100 degree temps???? Heck, as little as 15 years ago when I moved here, the 100+ temps wouldn't hit till early August. Well, that's the breaks. When we poop in our own bed, what are we to expect? Daisies?
But alas I digress. Back to the Jugs...

Okay, what the heck is that? Well, aside from the garden ghost, those are two milk jugs connected with 1/4 surgical tubing and a quick release connector. I picked up both from the good people at Home Depot. A little hot glue and a little while later I have basically a mini version of my rain barrels. Why? See that back tube on the left?
That's the weep condensation line from our A/C unit.
I saw it as a colossal waste of water. How much waste? Since I set up this little dealy, I am collecting on the average of 8 gallons of water a day!
Now one might say, "well, that doesn't sound like a whole lot". To which I reply, "Chew".
Here is the math: 8 gallons x 7 days = 56. That's one full rain barrel a week. Still scoffing?
And in an emergency, with a basic water filter, you have very drinkable water. That water coming out of that line is pure distilled H2O. It's like having a dehumidifier turned water maker right in your own home. Not like those don't already exist...
http://www.airwatercorp.com/
But this is the morons version of that.
It's really easy to cobble this together and if you live South of the Mason-Dixon
this is something I highly suggest doing.
Till next time: Green is Good!!!
Thursday, June 4, 2009
Okay, sadly, I found out, it's not all about me.
Just an update to my massive audience of about 3, in the future, I will be posting links to articles and stuff I find interesting. I surf a lot of various "green" sites (god, I hate that term) and from time to time, I will be linking to other types of info for your perusing pleasure.
Topics will include: how to make soap from yucca plants, how to can fruit and veggies, how to make rope, making fire the old fashion way (without a lighter), seed bombs and what to do with those old 100 CD plastic containers (what the heck are those, you ask?) well tune in to find out!
That's me, mr. cliffhanger.
There are some great sites out there that I get inspiration from and I just want to help promote these sites and to give me, hopefully, more traffic. Huh, I guess it really is all about me. No surprise really.
To start off, here is a good site that has absolutely nothing to do with being...grrrr...green, but I still find informative and just fun to check out.
http://www.shorpy.com/
Have fun!!
And remember...
Green is Good!
Monday, June 1, 2009
Worm poop is good.
Okay, I here is my most ambitious project to date. I had to call up some skills I hadn't used in a very long time. Plus some others, I had to make up along the way.


Composting, what is it? It's hiring slave labor to create rich earth. The labor is provided by worms. They eat our scraps and poop out gold! Um...brown, ah gold.
Here is the finished project:

Okay, what is involved in this little piece of urban insanity? If you never have welded before or have never used a cutting torch. I suggest you do a little reading up on it and if you can, get a friend who does know how to show you the basics. It will save you time, money and maybe your life. Always wear your welding goggles. I can't stress that enough. Your eyes are important and you don't want to fry them out of your head.
Make sure you have these handy as well:

Yes, there is water in that bucket. If you live in a very dry area like I do, you want to make sure you don't become the talk of the neighborhood by starting a forest fire.
That's said, let's get to it!
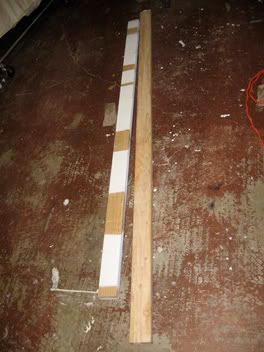
First the boring stuff. Making the crib or base.
I had some scrap 2x4's laying around from old projects.

My wife always asks me, "do we need this stuff? It's taking up space!" And I always respond, "yes, I do and it will save us a little money as well". At first she looked at me like I was crazy, well she always does that, but this time, was different. No not really, it was the same crazy look.
So I cut my pieces to length. They are the length of the barrel plus 1 foot. Giving my 6" of additional space on each side. Why so much? I wanted a wider base, because when the composter is full, it will be very heavy and I wanted to spread the damage out as much as possible.
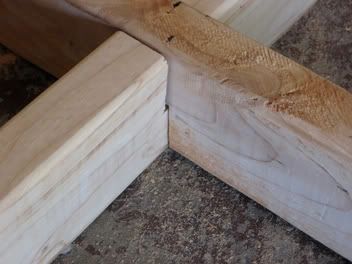
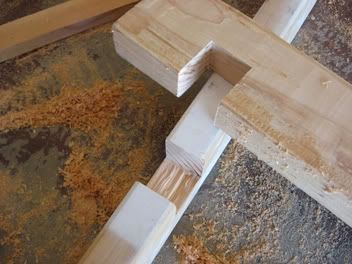
My next task was to cut in the notches.

Since the barrel is of an odd length, plus the additional 1 foot. I had to do a little math to have the notches evenly spaced.


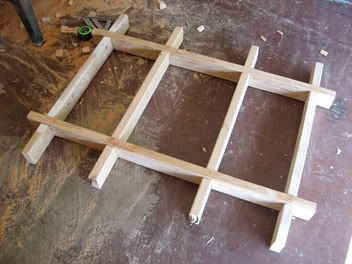
This is all assembled:

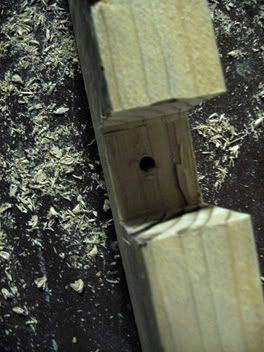
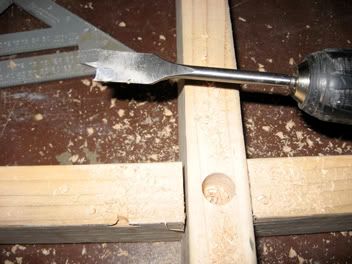
Next, I wanted to bolt it together to make sure it didn't fall apart.
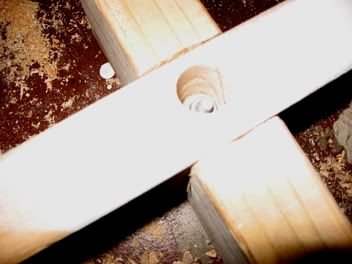
I got my center points at each cross section, made a mark and drilled with a 1" wide butterfly bit.

This was done on both sides. I then drilled a 1/4" hole for the bolt.
Here's one completed cross section:

I did this at each cross section. You need a lot of patience and time.
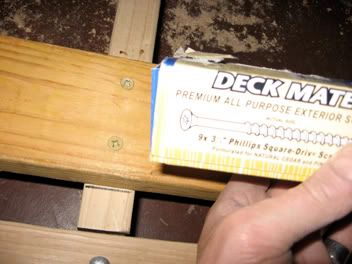
Next I put in the rails on which the little rubber wheels will sit.

As you can see I used 3" deck mate screws. Also the bolts are galvanized. This is going to be out doors, remember?
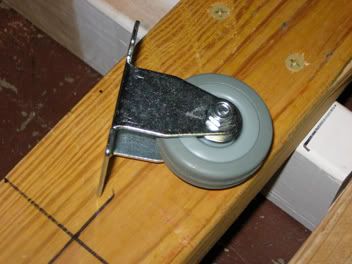
With the rails in place, the wheels come next.

Rubber caster wheels, made in the good old US of A. Got them from Northerntool for $2.95 a piece. Probably the most expensive part of this project. Well, maybe not.
You can see by the black cross mark. that is my setting for the wheel.

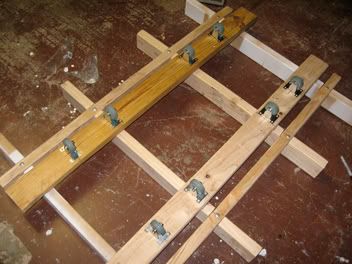
Here are all the wheels in place.
Time to take it for a test spin.

It's amazing when assembling something like this that I just pulled out of my...off the top of my head and it works the first time!
I highly suggest being really anal about the setting of the wheels. I was lucky, plus I gave myself a little wiggle room for adjustment. All the wheels hit the barrel exactly.
Here's a close up of the wheels in action:

Okay, the base is completed. Now onto the part that has FIRE. heh heh heh.
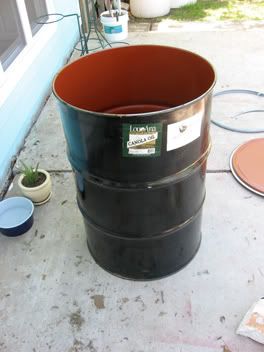
The barrel.

This is a food grade barrel that I picked up from a local farmers market. This guy was selling them for god knows what, but claimed they were good for rain barrels. Right, whatever. But for $20 bucks, he was the man!
But first there was a little problem.

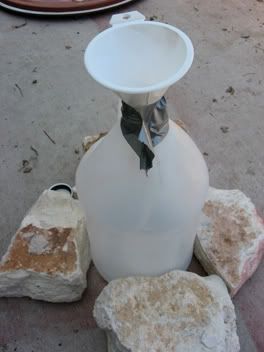
Canola oil. Still about a gallon left in the barrel. (note the garden ghost).
So I quickly rigged up a container with a funnel and poured it in.

I know, it's not pretty but it worked. I wiped out the remains with paper towels and the barrel was now ready.
Sadly, I don't have any photos of me welding, since I was by myself doing this, but I got some really keen road warrior type welding goggles that compliments my bald head, thank you very much!
At this point I would suggest having a couple of bandana's handy. One for your head and one as a bank robber type face mask. Things tend to spark and fly.
Here is my gear:

This little rig cost me 50 bucks. A minor investment but something I will be using many more times in the future.
Along with this deal, I suggest, some heavy leather gloves and a rod holder. We are talking a very very very hot flame.
Also, have more welding rods handy nearby than you think you will need and definitely more oxygen as you will burn through it faster than the fuel.
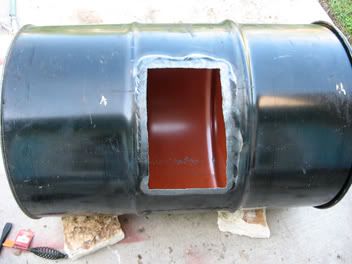
So with flame lit I got down to work. Here's a close up of the first cut:

Okay, I know, it looks like a blind monkey cut this, but give me a break, I haven't cut or welded in about 27 years since my dad gave me the basics.
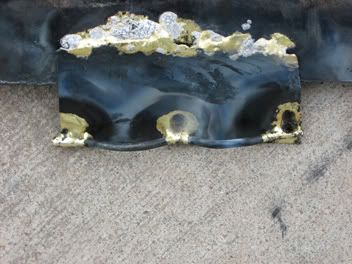
Here's the opening:

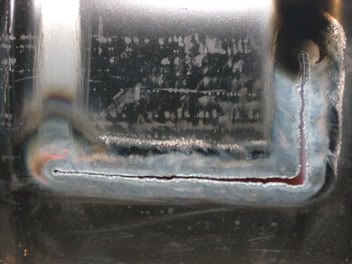
Next I had to make the hatch. I took the piece I just cut out and added some steel "wings" and this little dealy:

what the heck is that??
It's this:

Okay, I ask again, what the heck is that?
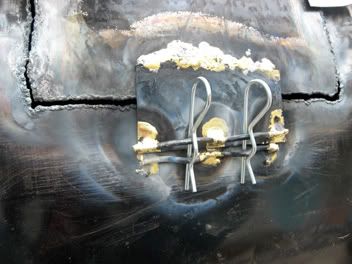
Well, yes, it's a bad photo, but I tacked it on to one of the "wings" and it will become the latch for the composter. Here's the finished product:

You can see I put two of those swiggly things on the latch and on the barrel itself and ran cotter pins through them.
Here is a picture of those "wings" I keep mentioning:

(note the ghost toes)
I needed to hinge this cover on:

Drilled some holes. Short bolts with a bunch of lock nuts later and I have a working hinge.
Here is the final project with the working hatch on the rollers, all painted and ready for use.
I later added 6 handled placed at thirds around the barrel to aid in spinning it.
What would I do different in the future? come up with a better latch design. Although this one works find, if the cotter pins aren't latched properly, there are serious consequences.
Final cost: 50 for the welding, 20 for the barrel, 30 for the wheels and another 30 for bolts, hinge, extra oxygen and goggles.
For a total of, roughly, 130 bucks. Not cheap, but certainly cheaper and much longer lasting than comparable volume composters out there. The cheapest I found at this 55 gallon range was 230. So I was 100 bucks ahead.
Difficulty: about an 7. You need basic wood skills and medium welding skills.
The only moving part is the wheels and the hatch. Everything is easily repairable.
Next up on my train of green insanity. A basic drip watering system from rain barrels.
Remember: Green is good!
Friday, April 17, 2009
Don't fence me in...
Okay, I'm back. I told you all that I would post something soon. Such none believers.


So this weeks installment of my insane quest to make my backyard green while maintaining my sanity in the process is/was raised gardens.
We had a raised bed:

This sucker was 4 X 4 and 3 feet deep. since we were so completely clueless at the time (3 years ago) we went along with the recommendations of a local nursery. Yeah, how to buy 1 1/2 cubic yards of dirt and give them our money. I was a tool. :( But no more!!
After going to the same nursery to check out their latest stuff (this was sometime in october), I had noticed that their test raised beds were only 6" high. WTF?? So I grab the nearest sales person by the throat, pin then down on the ground and forced him to divulge all his raised gardening secrets. Well, not really, but it sounded exciting, right? I asked him politely, WTF???? He was mystified as to why anyone at his nursery would give us such colossally wrong info. Fine, just spit it out.
All I needed was 6" of something to corral the dirt and dirt. Well, hell, we had plenty of dirt. 1 1/2 cubic freaking yards!
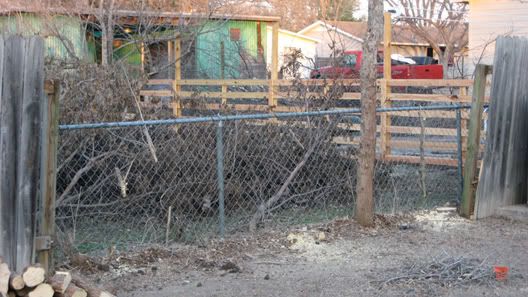
So our back fence was in a advanced state of decay and between our fence and the neighbors chain-link grew several now dead trash trees (china berry and hack berry) So with crowbar and hammer in hand I went to town.

for the moment I just ripped down what I needed.

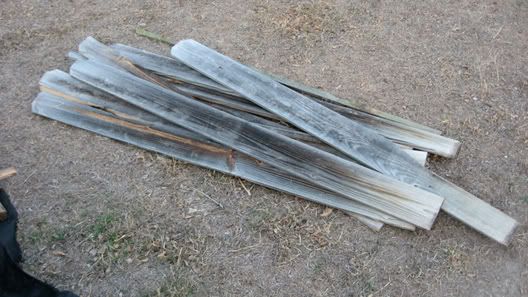
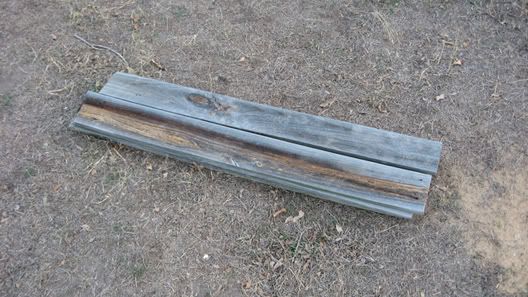
cut them to 4 foot lengths

and set to work getting them read for the raised bed.

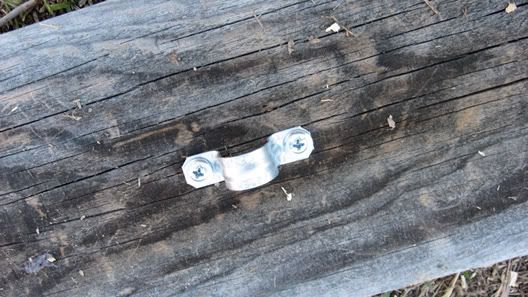
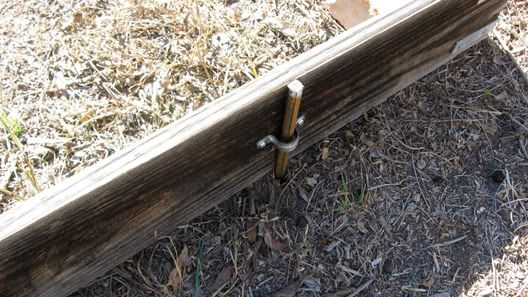
The little U brackets will act as guilds for the rebar. However, dumb me forgot to take a pick of the L brackets for the corners. (I'll include a follow up post with a photo)
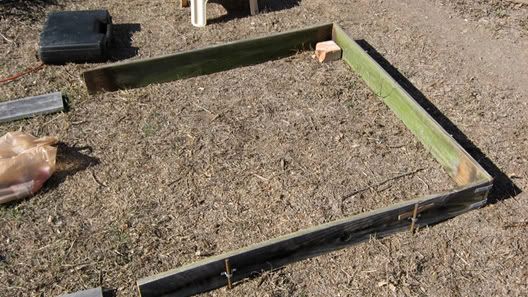
I began laying out my raised bed

You can see a little bit of the L bracket in this photo.
I then began connecting the pieces.

Yes, I know the photo looks upside down, that's because it is. I took it that way, okay? get off my back.
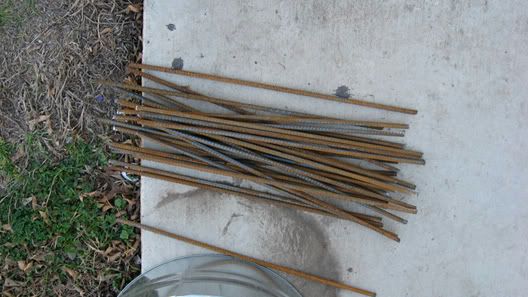
Here is the rebar (the most expensive part of this crazy thing)

These are 2 feet x 1/4" rebar. Each costs 1.25 a piece. Since this time I have improved my cutting torch skills, I will next time get a longer piece (save booku money) and cut it myself.

I drove the rebar down till the top edge was even with the top edge of the wood. Thus placing the rebar 1 foot 6 inches in the ground. It's not going anywhere.
Here is the completed layout.

Note the garden ghost.
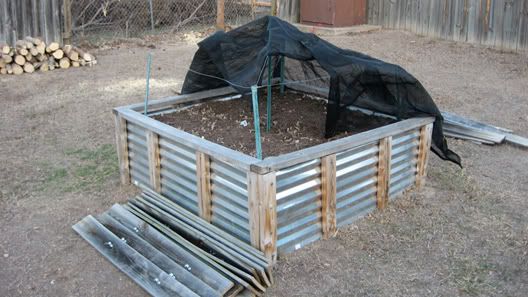
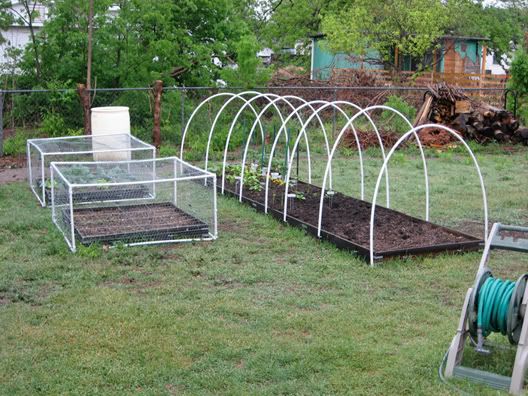
Here's what it looks like today:

I constructed the PVC/chicken wire enclosures to keep out the &%@*!! squirrels. The hoops on the long bed will support 60% cloth to cut down on the intense summer sun.
So there it is, our garden. We are currently growing: Kale, lettuce, peppers, turnips, beets, onions, garlic, potatoes, tomatoes, cucumber and squash.
This doesn't include our herbs, fruit trees and berry bushes. That's for another time
Remember: Green is Good!
Cheers!
Subscribe to:
Posts (Atom)